|
|
|
Here's how you got here:
|

|
How to Do Stained Glass - Soldering Stained Glass

|
|
Soldering the workpiece
|
|
In the commercial stained glass studio, it is common to see 200 watt soldering irons in use with 1/2" to 5/8" inch diameter tips. These irons can deliver sufficient heat to the 1/4", 3/8" and 1/2" wide lead cames which are quite often encountered in the windows which are produced commercially, for kitchen cabinets, restaurants, churches, libraries and the like. Irons of this wattage weigh at least two pounds, and quite often more.
For hobby work, and if you are not a speedy person, I recommend the 60 or 80 watt iron. If it is a well made iron, it will deliver all the heat you could possibly want, and they weigh only a few ounces. As you pick up speed, you will want to consider a 100 watt iron. A good 60 watt iron will deliver a tip temperature of around 1000 degrees Fahrenheit, but will not maintain that temperature consistently if you are working quickly, hence the recommendation for a higher wattage. Be sure to get a plated tip when shopping for an iron.
DON'T LET THE SOLDERING IRON OVERHEAT! Provide yourself with some method of shutting off the electricity reaching the iron intermittently, so that the iron doesn't reach temperatures high enough to melt the lead came. Lead will melt at 650 degrees Fahrenheit, so you should shut off your iron before it begins to show symptoms of melting the lead. The iron cannot get hot enough to melt copper foil, but if you let the iron overheat when soldering foiled work, your solder will flow like wine, and pour right through the small seams between the glass pieces and wind up on the workbench beneath your work piece. You can check out the temperature from time to time on a piece of scrap lead. If the iron is too hot, it will melt the lead. It is better to let it melt a piece of scrap, than to melt a piece of lead already incorporated into the work piece.
There are three ways to shut off the electricity, each a little more convenient than the other:
1.) Simply unplug the iron from time to time. This is not too handy if the receptacle is near the floor.
2) Install a plug-in toggle switch on the outlet, or install an in-line switch on the cord of the soldering iron.
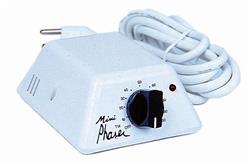
3.) Buy a wattage controller such as the one shown here. This device can be plugged into an electric outlet, and in turn, a soldering iron can be plugged into it. It works on the principle of an electric blanket, alternately cycling on and off. There is a dial that is calibrated from 0 to 100, representing the percentage of time the current will be allowed to pass through.
Inland Craft makes a handy 100-watt soldering iron called the Temptrol, which has a temperature controller built in.
|
|
|
|
|
Inland MiniPhaser Temperature Controller
|
|
Item no:
70402
|
|
Inland/Reentel International
item:
60014
|
|
Retail price:
$37.35
/each
|
|
6 or more $33.62 (10% discount)
|
|
In stock:
0
(units: each)
|
|
|
|
No longer available.
|
|
Click to view or buy this item
|
|
|
|
This imported solid state wattage controller will accommodate any soldering iron up to and including 600 Watts. Ideal for the hobbyist. 3.75"W x 4.5"D x 2.0"H.
|
|
|
|
|
Soldering in the Lead Came Method
|
STEP ONE
APPLY THE FLUX. (See our "Chemicals, Consumables and Notions" section.) There are several varieties of fluxes available. Lead came does not require a strong flux, so I always settle for for a very mild flux, such as a fluxing gel. Whichever flux you choose, it will be sufficient for lead came work. The flux removes the oxides from the surface of the lead so that the solder can fuse to it. (If you did not use a flux, the solder would lay on the surface of the lead in droplets, and after they cooled, you could brush them off.)
I apply the fluxing gel with a flux brush onto the joints (intersections) of the lead which will be soldered.
STEP TWO
I then plug in my iron and wait for it to heat up. I test it from time to time until it is hot enough to melt a piece of solder being held against the tip. When this temperature has been reached, I unwind about 6 inches of solder from the roll and, holding the iron in one hand and the solder in the other, touch them together about 1/4" above the first joint I wish to solder. I allow a bit of solder to melt onto the tip, and then transfer the melted solder onto the joint rapidly, and just as rapidly, remove the iron from the joint. The tip of the iron should stay on the surface of the lead just long enough to heat the lead and transfer the solder to it. At 800-1000 degrees, it doesn't take long to heat a piece of small lead came, so don't dally. After a few sessions you will notice that a rhythm develops, and soldering will become easy.
I unplug the iron and remove the nails holding the project in position. I then wipe off the excess flux with a piece of paper towel, turn the project over and apply flux onto the unsoldered side. (There is no need to hold the project in place with nails.) I proceed as before, and solder the second side.
|
|
Click to see more
|
|
|
Soldering in the Copper Foil Method
|
When working with copper foil, you will solder all of the visible pieces of copper, so that when you have finished, none of the foil will be visible.
I brush the flux onto all of the metal on the workpiece which is showing. After I apply the flux, I let the iron heat up, and then I unroll a piece of solder and move the tip of the iron and the end of the piece of solder continuously along each seam where the wrapped pieces of glass touch each other. I also solder all of the edges of the outside pieces, as far as I can reach. When I have completed all of the soldering, I unplug the iron for a short time while the work is cooling (beware of picking it up right away, it will be hot!). After a few minutes the heat will have dissipated enough so that I can pull the nails, pick up the piece (which will now hold together) and turn it over. I then place it on the workbench and solder the reverse side. Nails are no longer needed to hold the pieces in place, because it is a complete assembly.
I then let the work cool, and wash it with warm water and a detergent to remove the flux which is usually smeared over the glass. I use a commercial glass cleaner to give it a final polish.
I usually use a chemical patina to darken the solder after I have cleaned the work. SEE "CHEMICALS, CONSUMABLES & NOTIONS".
Glazing Stained Glass << Previous Next >> Cementing Stained Glass
|
|
Click to see more
|
|
|