Our regular hours are Monday through Friday, from 10 a.m. to 4 p.m. and Saturday 10 a.m. to 2 p.m.
 

Whittemore-Durgin Stained Glass Supplies
825 Market St., Rockland MA 02370
Phone: 781-871-1790  Toll-free: 800-262-1790
Stained glass supplies, art and architectural glass, and so much more.
Find us on Facebook   

Check out our Stained Glass Classes!

Stained glass supplies, art and architectural glass, and much more.

Here's how you got here:
Skip Navigation Links

How to Do Stained Glass - Glazing Stained Glass


Cutting Glass with Patterns << Previous          Next >> Soldering Stained Glass

Glazing
There are two methods of fastening the pieces of glass together in the workpiece.. In one of them, the glass is inserted into lead channeling, and the lead channels are soldered together where they intersect. This method is used when making large windows which will be exposed to the elements. The copper foil method involves wrapping the edges of the glass with strips of adhesive backed copper foil, and then coating all of the exposed foil with solder. This method is used for making stained glass lamp shades and small decorative objects. The process of wrapping the pieces of glass with lead came or copper foil, and joining and soldering them is called "glazing". The following is a brief look at how each of these methods work.
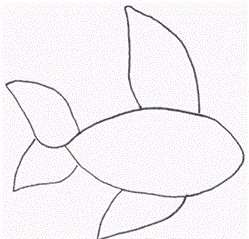
Glazing, in THE LEAD CAME METHOD
I begin by taking a copy of the pattern and placing it on my workbench. For the pattern I am using, which is some sort of fish, I use a small variety of lead came in two different shapes, #8065 "U" and #8064 "H", which are listed in "METALS" on this site. I use the "H" shaped lead when two pieces of glass are side by side in the design. The edges of the adjacent glasses are separated by this double channel. I use the "U" shaped around the very edges of the project to give a finished look. If the lead has been coiled into a tight circle, I straighten it by stretching it between two pairs of pliers, or by using a lead straightener. See "HAND TOOLS & APPURTENANCES". If the channel has been crushed, I open it up by running the pointed end of an ordinary lead pencil along the groove to open it up again.
Click to see more
I now assemble
I now assemble
the glass and lead. I use small nails tacked into the workbench as a fence to hold the pieces of glass and lead in position as I progress across the pattern. Each time I add a piece of glass or lead, I remove a nail and put it back into a new position. I press the lead firmly onto the glass and avoid leaving any "daylight" between the pieces. I use the lead in as long a piece as possible to reduce the number of joints to be soldered. I cut the thin leads used in this project with ordinary household scissors. When I cut heavier leads I use a lead knife. (SEE "HAND TOOLS & APPURTENANCES") I prefer to use a lead knife because I can cut the lead right in position on the bench without lifting it out of place. The cut is much more accurate when I do it this way.

Lead stored for any length of time will oxidize and turn dull. Lead must be bright and shiny to take solder easily. If the lead you are using has oxidized, scrape the lead with the edge of a knife at the spots where you will be applying the solder. When you have finished glazing, you should have every piece of glass and lead in place, held tightly in position with small nails, and ready for soldering.
Click to see more
Glazing in the Copper Foil Method
Again, I begin by taking a copy of the pattern and placing it on my workbench. I then unroll a suitable length of adhesive-backed copper foil, (see "METALS")remove the backing, and completely wrap the edge of the first piece of glass that I pick up. I rub the wrapped edges of the glass with a popsicle stick to be sure that the foil is securely attached, with no bubble or gaps. I then place this piece of glass on the corresponding place on my pattern, and go on to the rest of the pieces of glass, wrapping them and placing them onto the pattern.

When I have finished with wrapping and placing the pieces onto the pattern, I drive small nails around the edges of the assemblage of glass pieces to hold them snugly in position. Then I am ready for the next step.


Cutting Glass with Patterns << Previous          Next >> Soldering Stained Glass
Click to see more